How to Paint Warhammer: Highland Bases
- No Comments
How to Paint Warhammer: Bases
In this tutorial we’ll show you How to Paint Warhammer: Bases. This is a super-quick and super-easy guide to basing your miniatures, brought to you by me, Dr. Drybrush!
Recipe
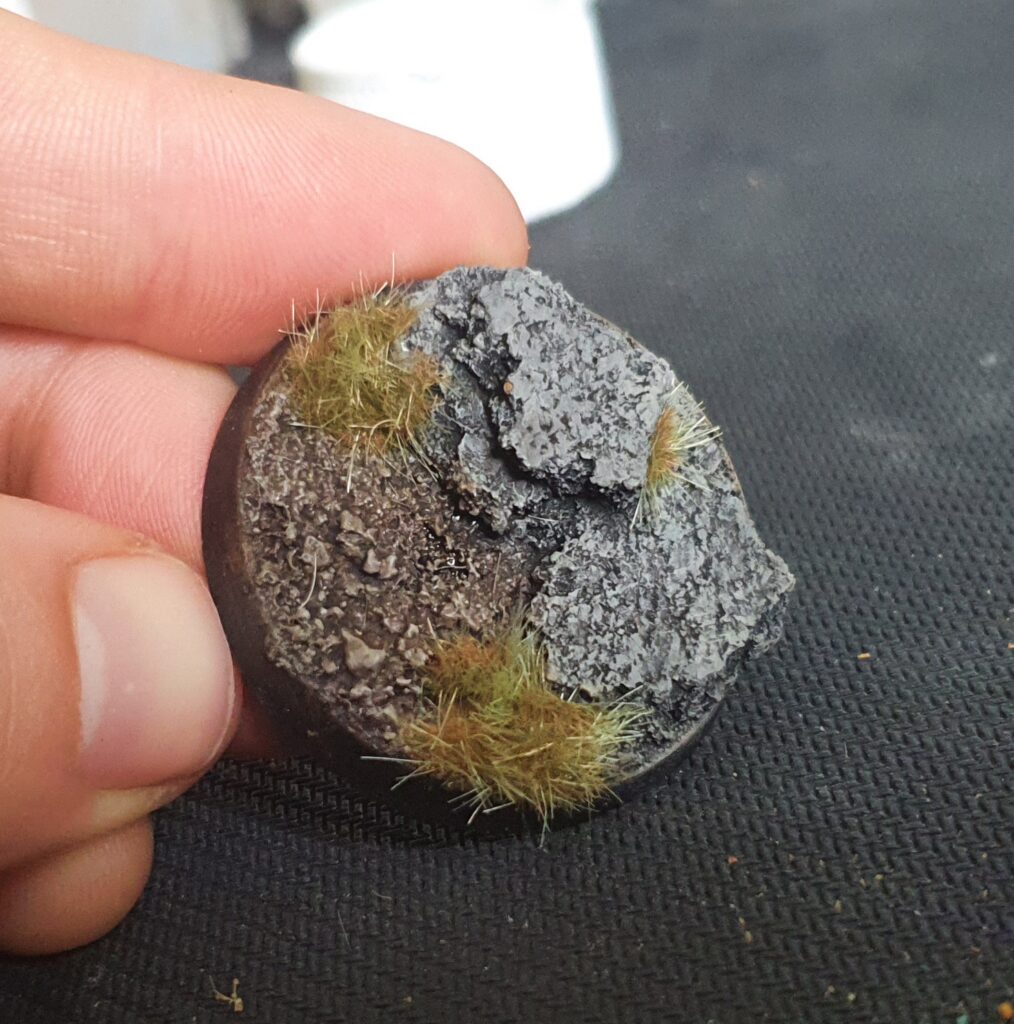
Looks none too shabby eh?
To get this effect all you need is;
- Basing Sand
- Super Glue
- Cork sheet & chunks
- Paints – Nuln Oil, Mournfang Brown, Rakarth Flesh, Eshin Grey, Dawnstone, Celestra Grey, Steel Legion Drab
- Grass Tufts
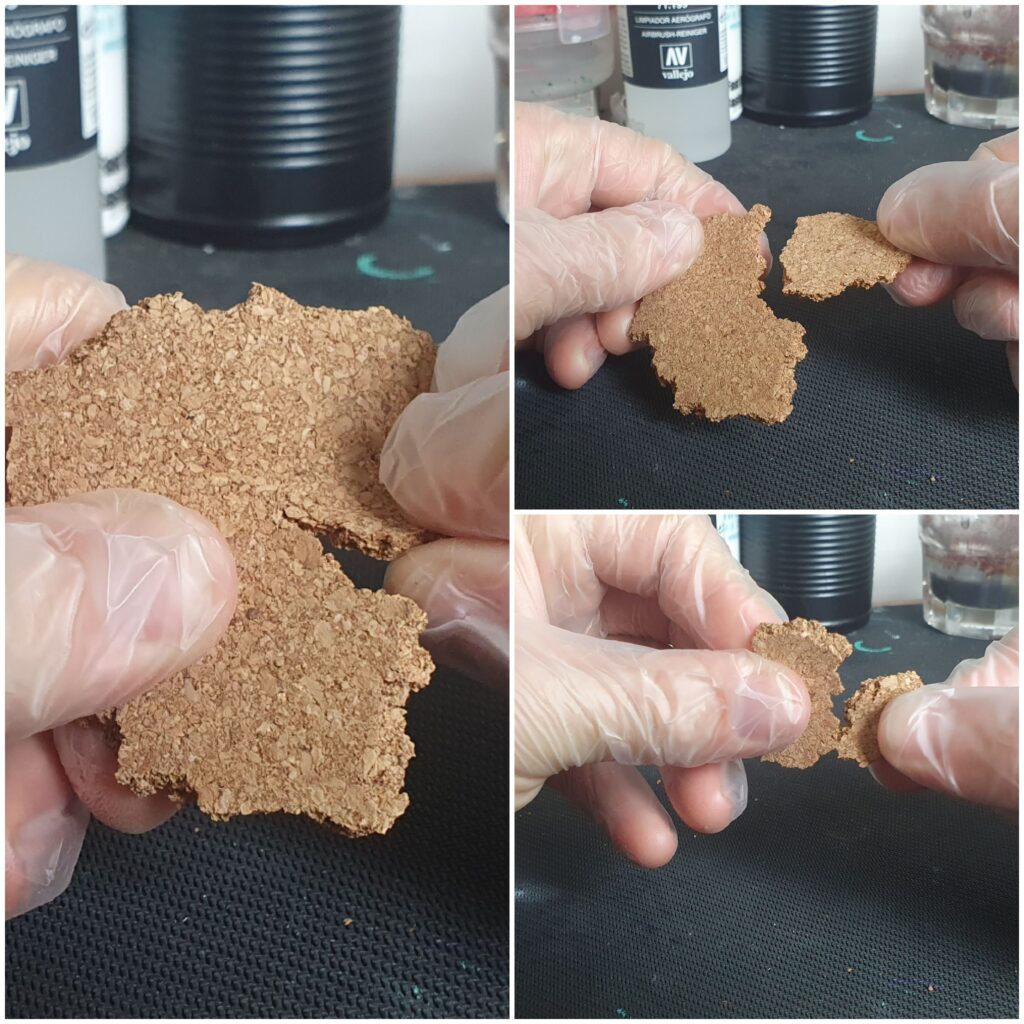
Step 1: Tear it up!
Grab the cork and get tearing, make random, irregular, organic shapes of various sizes and be sure to tear it all in the same direction, so if you started making the cork shape by tearing it towards you (like in the picture) keep tearing it towards you, this way the edge will make visual sense once its glued to the base.
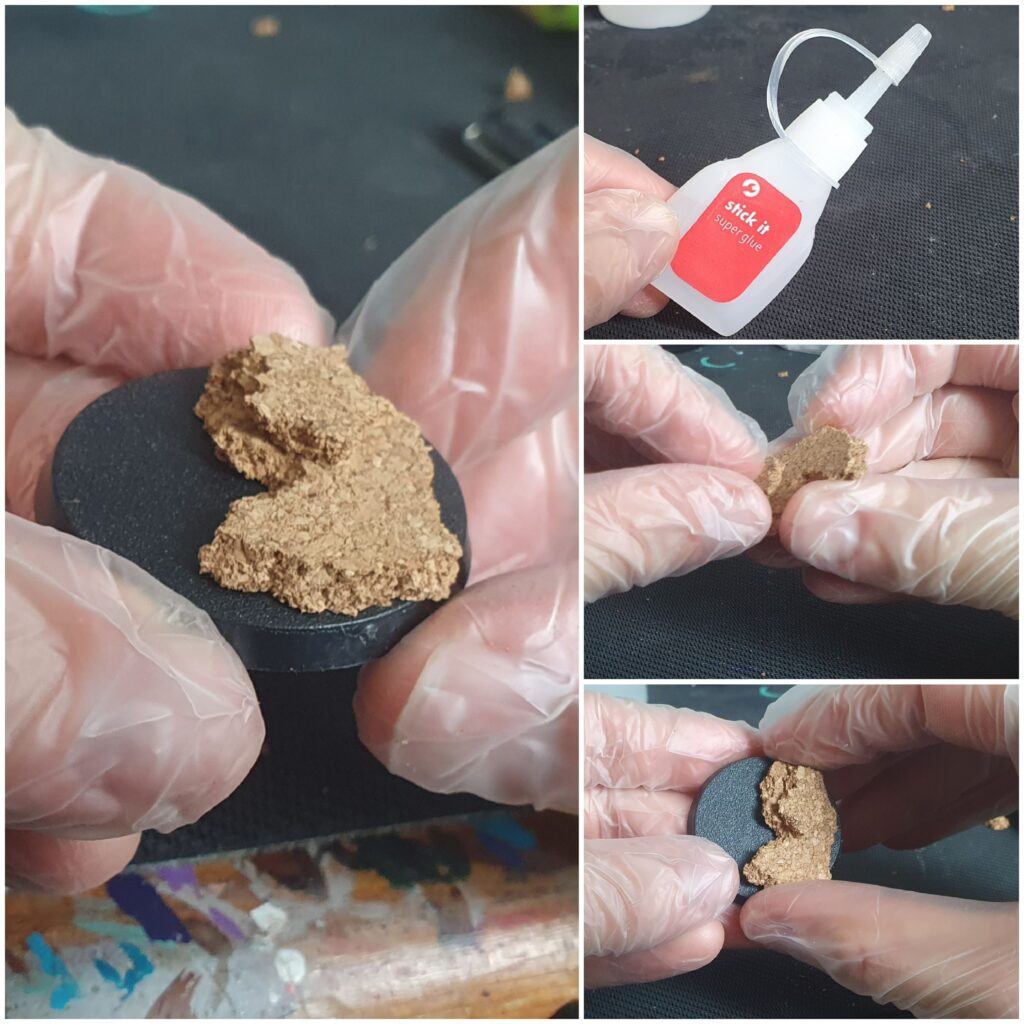
Step 2: Dryfitting and Gluing
Make sure to dry fit your new cork rocks onto the base before settling on a size. Dryfitting is the practice of assembling a model without any glue to make sure it fits. Feel free to stack them or have multiple rocky sections on the one base, as a general rule I’d recommend one or two layers of rock height for troops and elites and reserve your bigger rocks and stacks of three for characters and vehicles but that said, it’s your hobby, do it your way and don’t let anyone tell you otherwise!
Once you’re happy with the dry fit get out your super glue and stick everything down to your base.
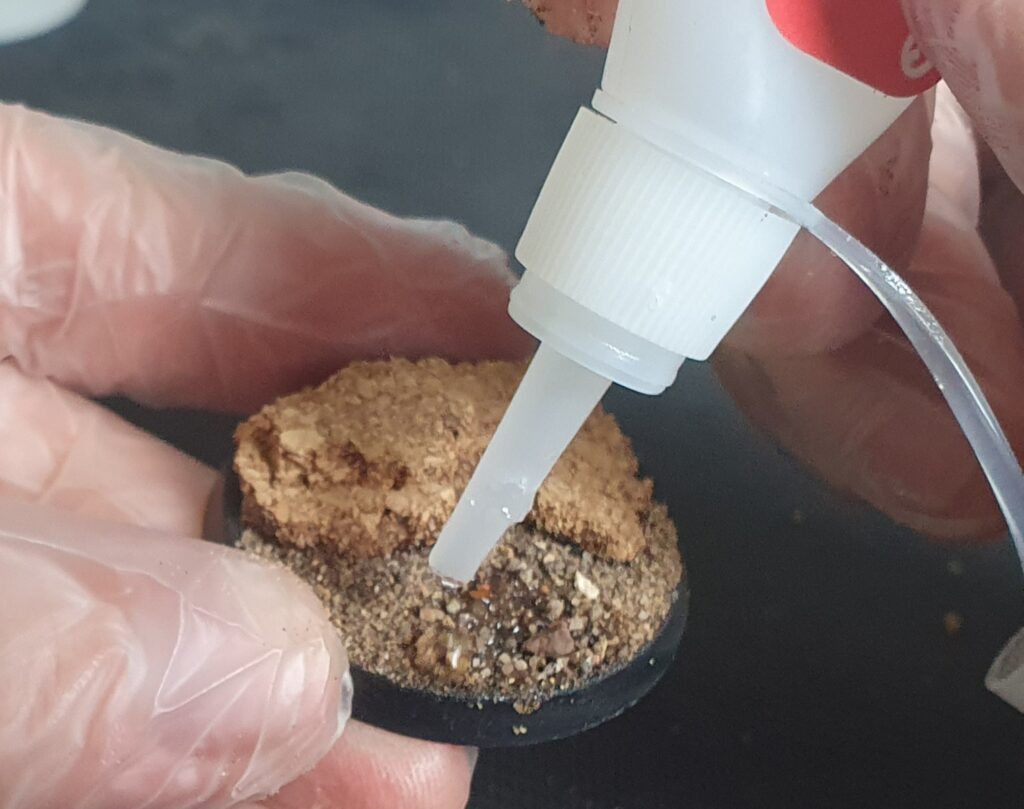
Step 3: Sand on, sand off
So you’ve got your rock on and its starting to take shape but now we need some ground texture, grab your container of sand, apply a thin layer of glue to the base before doing your best salt bae impression and lovingly sprinkle the sand on. For extra details put some of the bigger chunks of basing material on top of the base to your taste and apply super glue over the top!
Step 4: Base Coat
Once everything is dry (make sure it’s super dry or you’ll ruin your brush!) basecoat it all with black or very dark grey.
Step 4: Drybrush
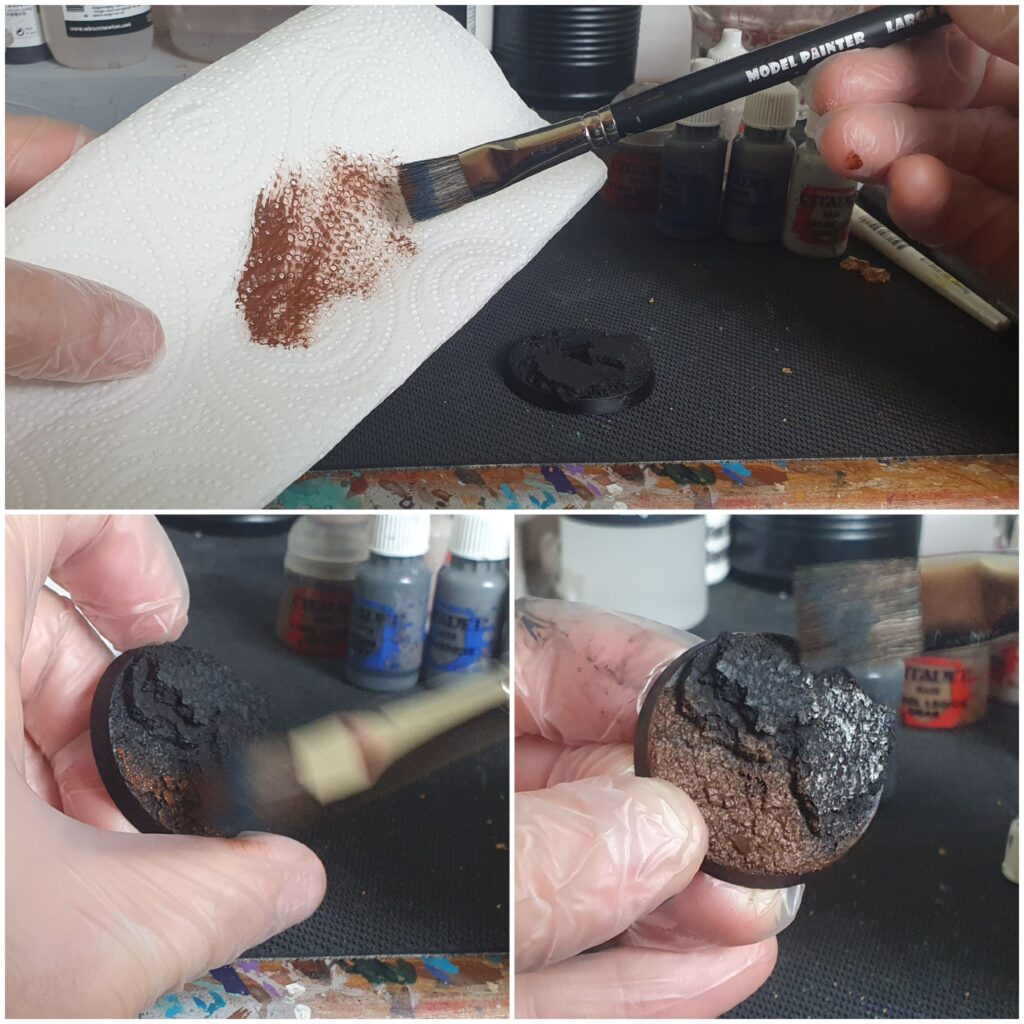
Painting this base uses almost exclusively the technique known to ancient legend as dry brushing which basically consists of loading paint onto a big chonky brush and scrubbing most of it off on a piece of kitchen roll until there is very little paint left, with this done we are going to use fast, gentle brush strokes to essentially “tickle” the paint onto all the textured areas of the base so that we leave the darkest areas dark and still manage to colour the areas we want.
For the ground texture area , in this example , we are going to use a fairly heavy dry brush of Mournfang Brown followed by a more selective dry brush of Steel Legion Drab and then finally we’re going to gently tickle the base with a highlight dry brush of Rakarth Flesh.
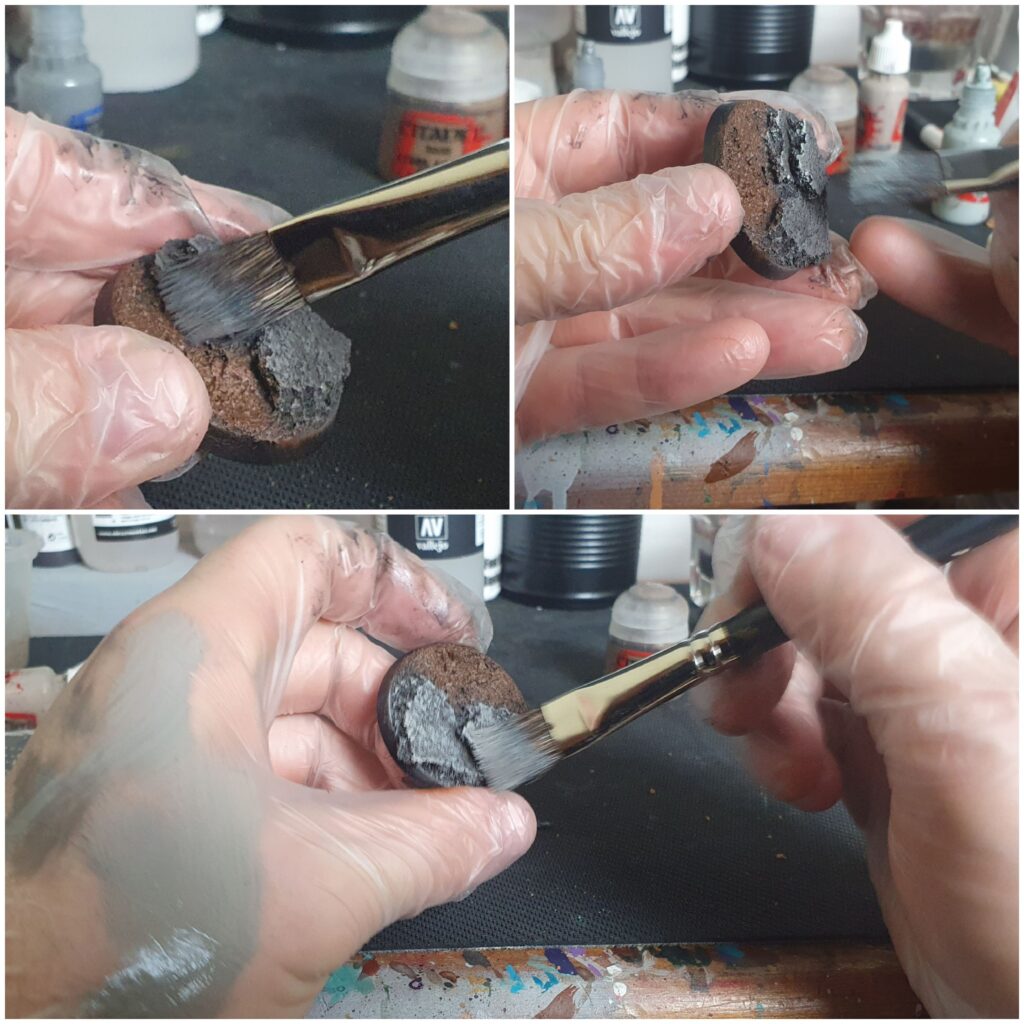
For the rocky area we do a heavy dry brush of Eshin Grey, followed by a more selective drybrush of Dawnstone. With the Dawnstone focus your attention more to the outer edges of the rocky sections to build up some highlight and then finally we use some Celestra Grey with the gentlest of gentle dry brush tickles almost exclusively on the edges of the rocks to get our final highlight complete.
Step 5: Finally the final bit, the bit of finalisation…
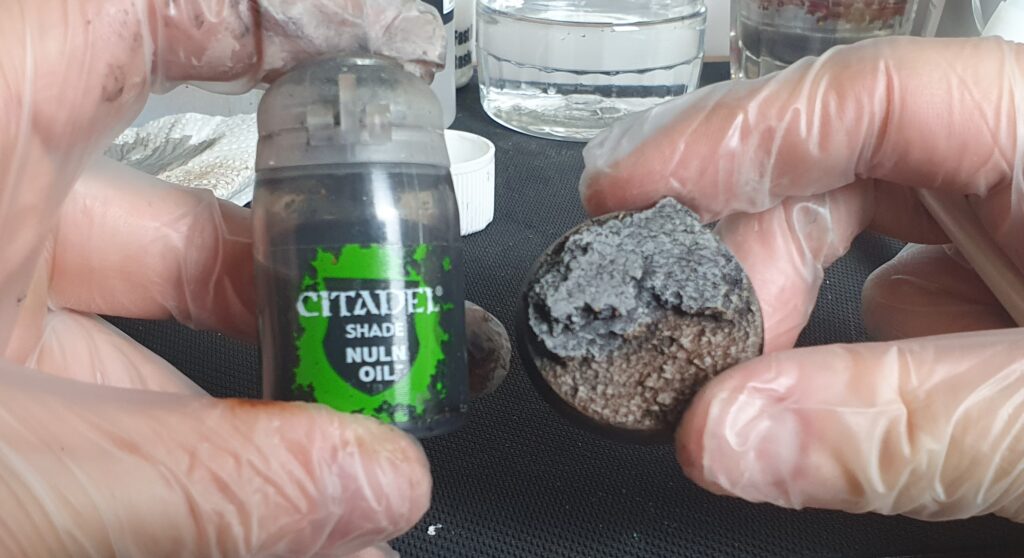
Leave the base to dry, its OK if it looks a bit, well, “bright”. Don’t start pledging your allegiance to the Chaos Gods just yet, instead reach for the “liquid talent” secret weapon, the one, the only, the mighty Nulin Oil!
Wash this all over the base, the rocks, the ground texture and then following the time honoured tradition of wargames painters everywhere, forget you’ve left the lid open and spill it everywhere!
OIL FOR THE OIL GOD BWAHAHAHAHAHAHA!
After you’ve mopped up both the Nulin Oil and your tears of woe now you can shed tears of joy at your awesome base!
Feel free to add some grass tufts to help spice it up and that’s it, a thing of beauty.
You can do this technique for your entire army and really help take your basing a level beyond the norm, don’t stop there though, try adding some texture paint to the base instead, maybe do some red martian rocks instead of the more “normal” ones here, maybe paint them like a road, let your imagination run wild!
Outro
Hopefully you’ve enjoyed this article on How to Paint Warhammer: Bases and you’ve got some inspiration for your own cool bases, if you followed this to the letter then all it took was some cork, sand, a potential house fire, an existential crisis, spilled Nuln Oil and the potentially summoning of a new Chaos God of Citadel washes!
Thanks for reading and happy hobbying!

